

The LangChain adapter is a way to run a LangChain-powered AI Agent (using ASI-1 / ChatOpenAI) inside the Agentverse + LangGraph runtime, so it can be exposed as a live, reachable Agent on the Agentverse and ASI:One networks.
How Adapters Connect to Agentverse
All adapters implement the Agent Chat Protocol (ACP). This enables your agent to communicate with ASI:One, respond to user queries, and interact with other agents across the Fetch.ai Network.
Each guide shows how to integrate the Chat Protocol using a specific framework or system.
In this example, we build a LangChain-based Agent powered by ASI:One and run it inside a LangGraph runtime. The Agent is exposed through a tunnel-enabled development server and can be registered on Agentverse using a persistent Agent URI.
Public Endpoint Requirement
Your agent must expose a public endpoint that Agentverse can reach. This endpoint is used to verify availability, establish communication, and exchange messages using the Agent Chat Protocol.
Before installing dependencies or running the Agent, make sure your project follows this structure:
This structure is required for the following reasons:
pyproject.toml: it defines the project dependencies and is used by uv sync to install and manage the environment.langgraph.json: it configures how the LangGraph runtime loads and executes your agent.agent.py: it is the main agent implementation and entrypoint referenced by the configuration.Without this structure in place, dependency installation (uv sync) and Agent execution will not work correctly.
Note: The exported
agentobject must match the name referenced inlanggraph.json.
Before setting environment variables, ensure the project dependencies are installed and the virtual environment is activated. If using uv, run uv sync to create and synchronize the environment from your project configuration, then activate it:
This ensures all dependencies defined in pyproject.toml are installed correctly.
Remember that you must provide the AGENT_URI and ASI1_API_KEY as environment variables to correctly run the agent. You can get the first from Agentverse UI following the steps provided when launching your agent on Agentverse. You can get the ASI:One API key directly from ASI:One. Once you correctly set these variables, in the code example above (agent.py) replace the placeholder for AGENT_URI parameter with the one you retrieved.
You can export them like this:
When running the agent through the LangGraph runtime, you must define a langgraph.json file in your project root. This file tells LangGraph how to load your agent graph.
In our example, we have what follows:
Do keep in mind that Python module paths must not include .py. Considering this, "agent:agent" indicates that LangGraph should import the agent module and use the exported agent object as the graph entry point.
For Agentverse and ASI:One to access your agent, it must be exposed via a public endpoint. When running locally, this is handled automatically using a tunnel.
Run the following command at the root of your project, where langgraph.json lives:
Head over to Agentverse.
Now, that we covered the needed information, we can run this example step-by-step:
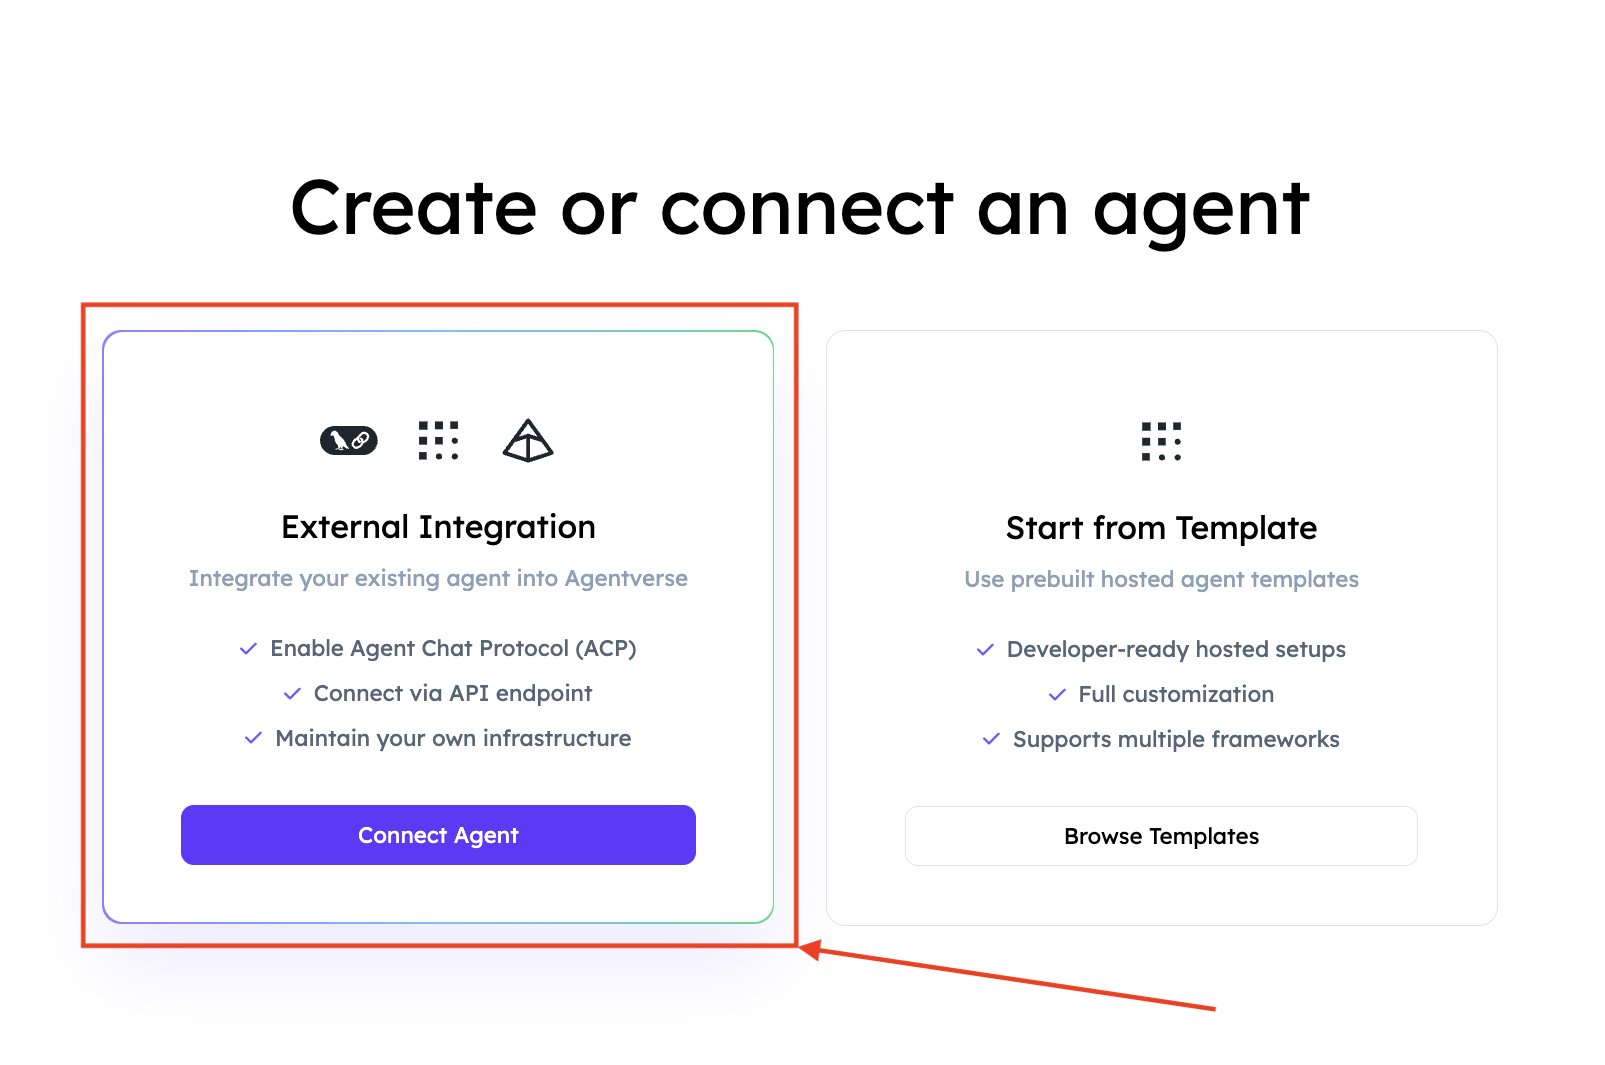
Now, head over to Agentverse and log in. Click on the Agents tab, then click on Launch an Agent button and select External Agent option.
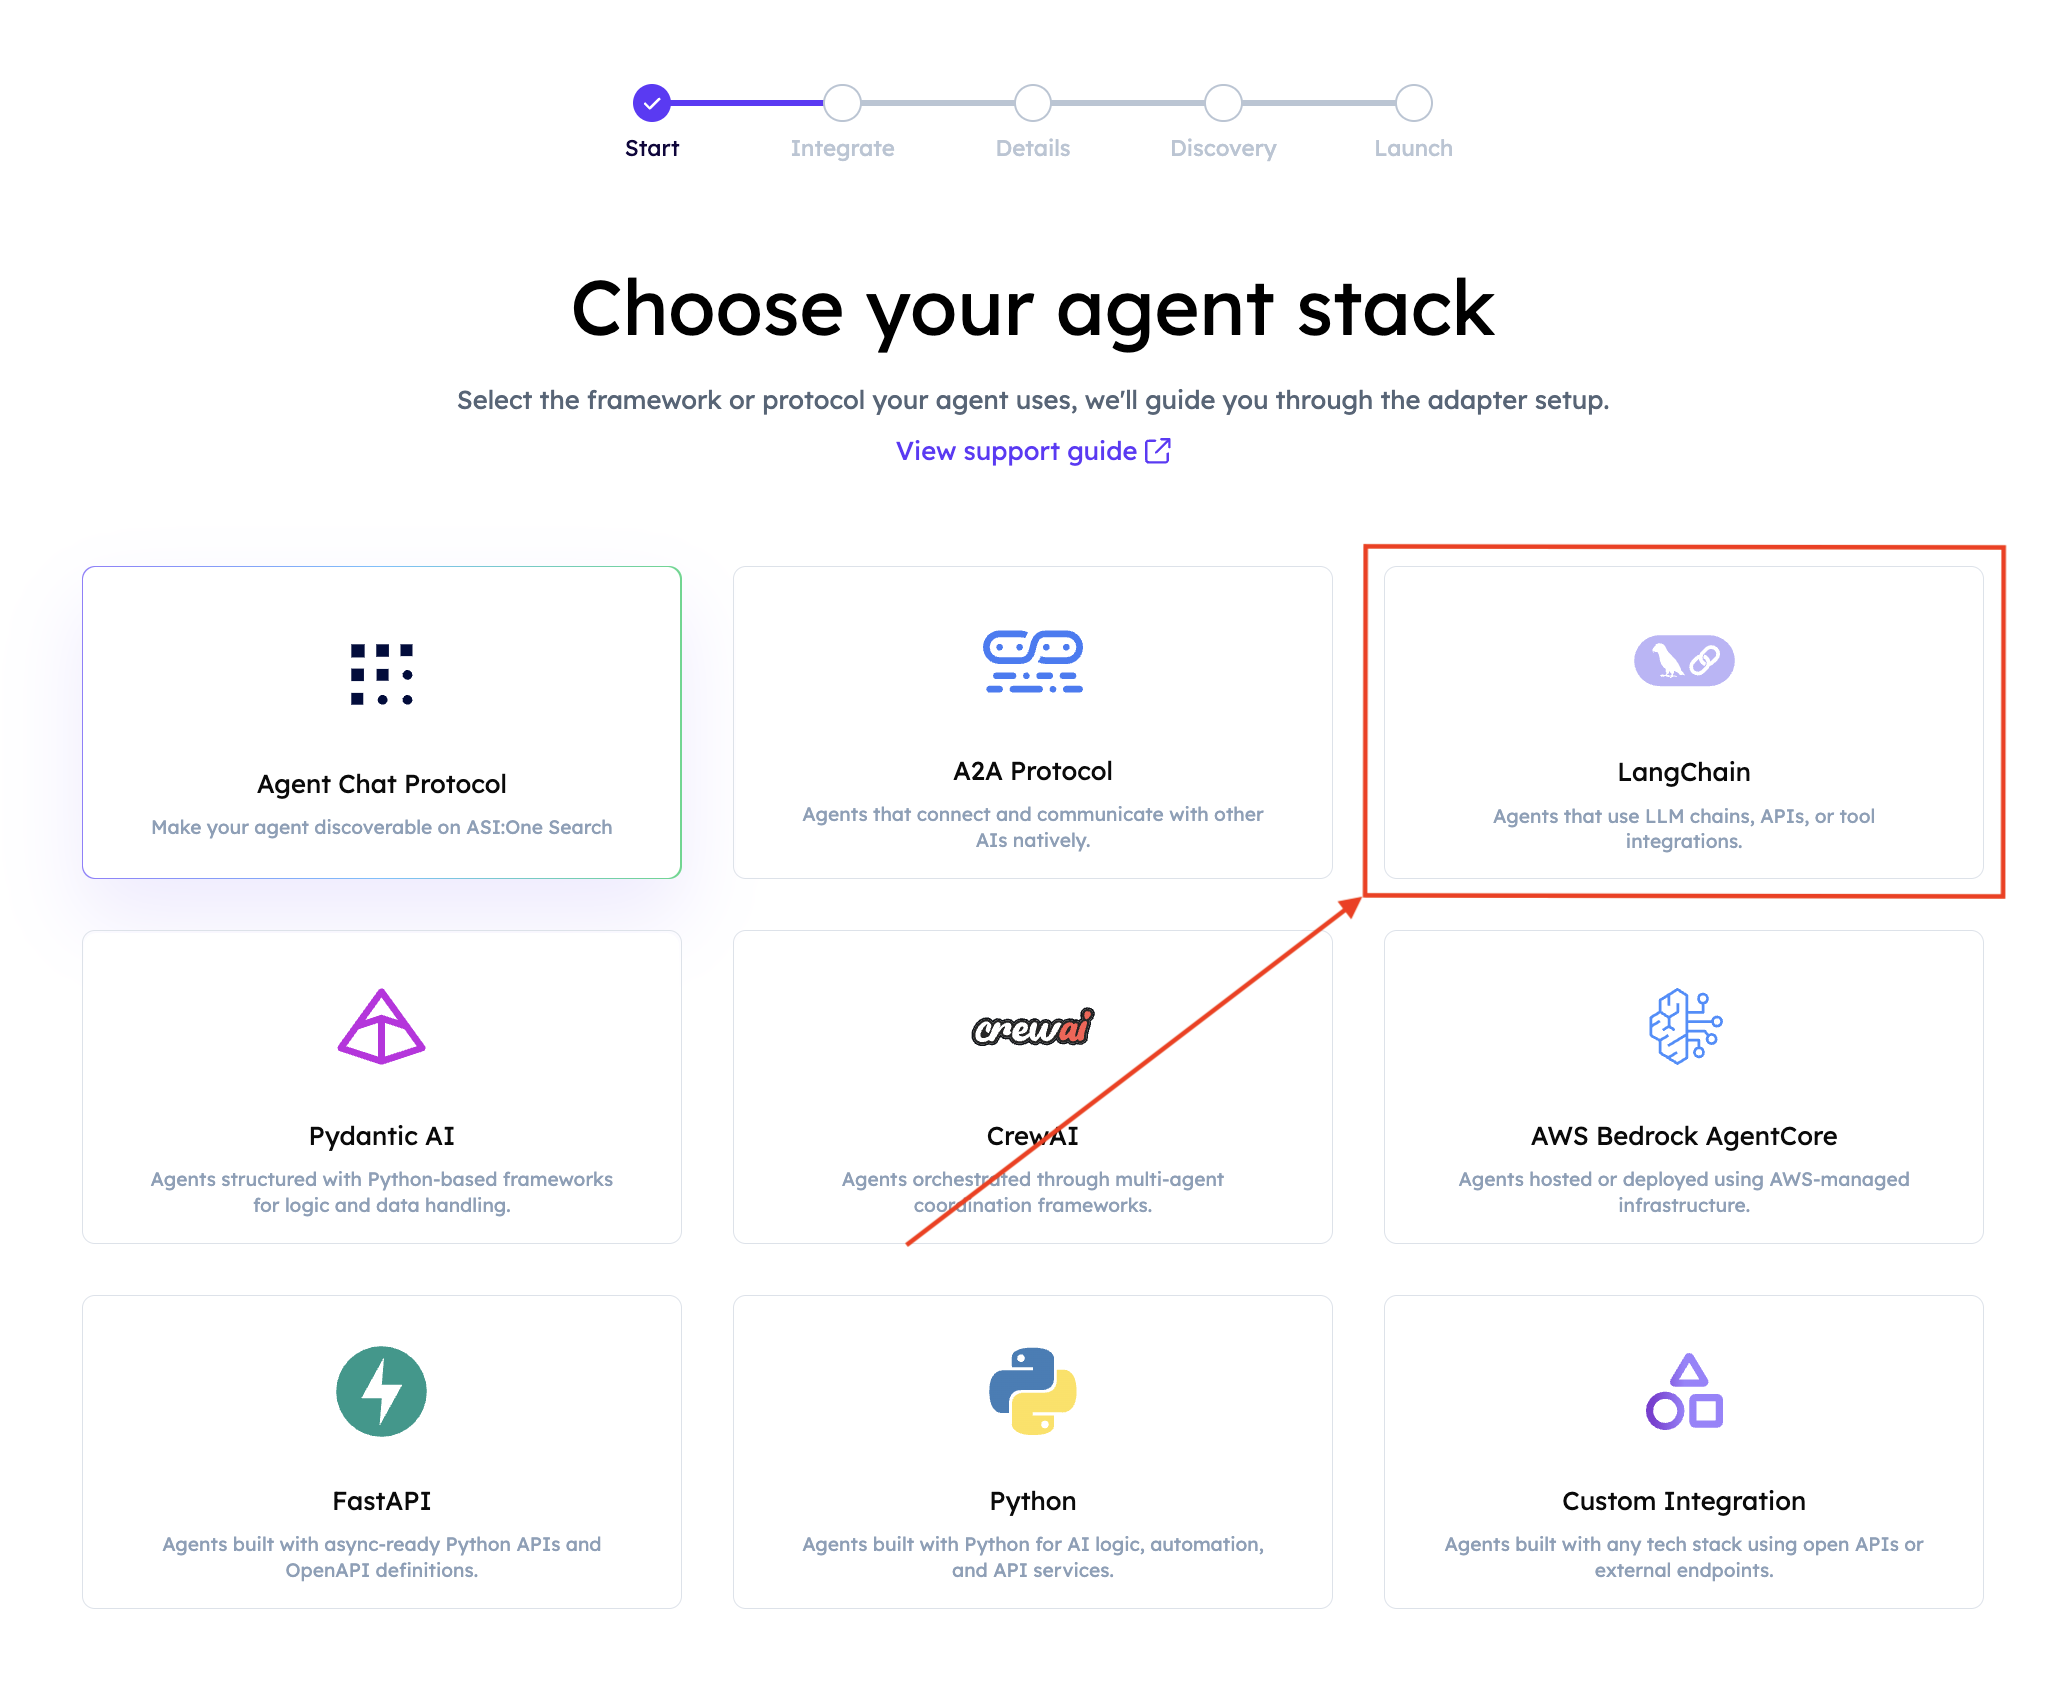
Select LangChain.
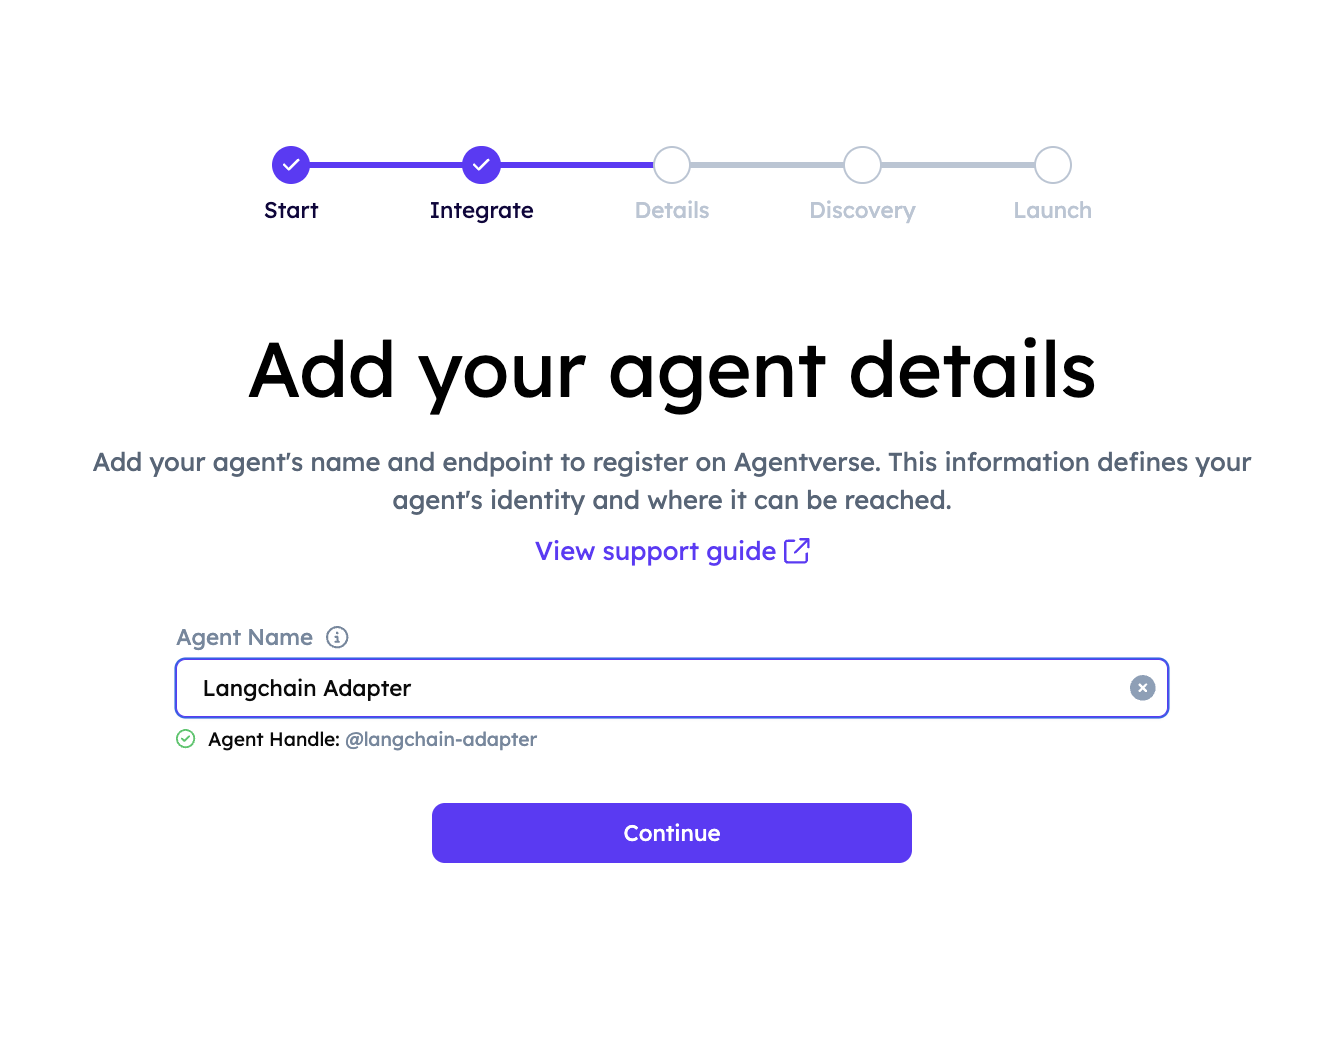
Provide a name for your Agent. An Agent Handle will be automatically generated based on the name you enter.
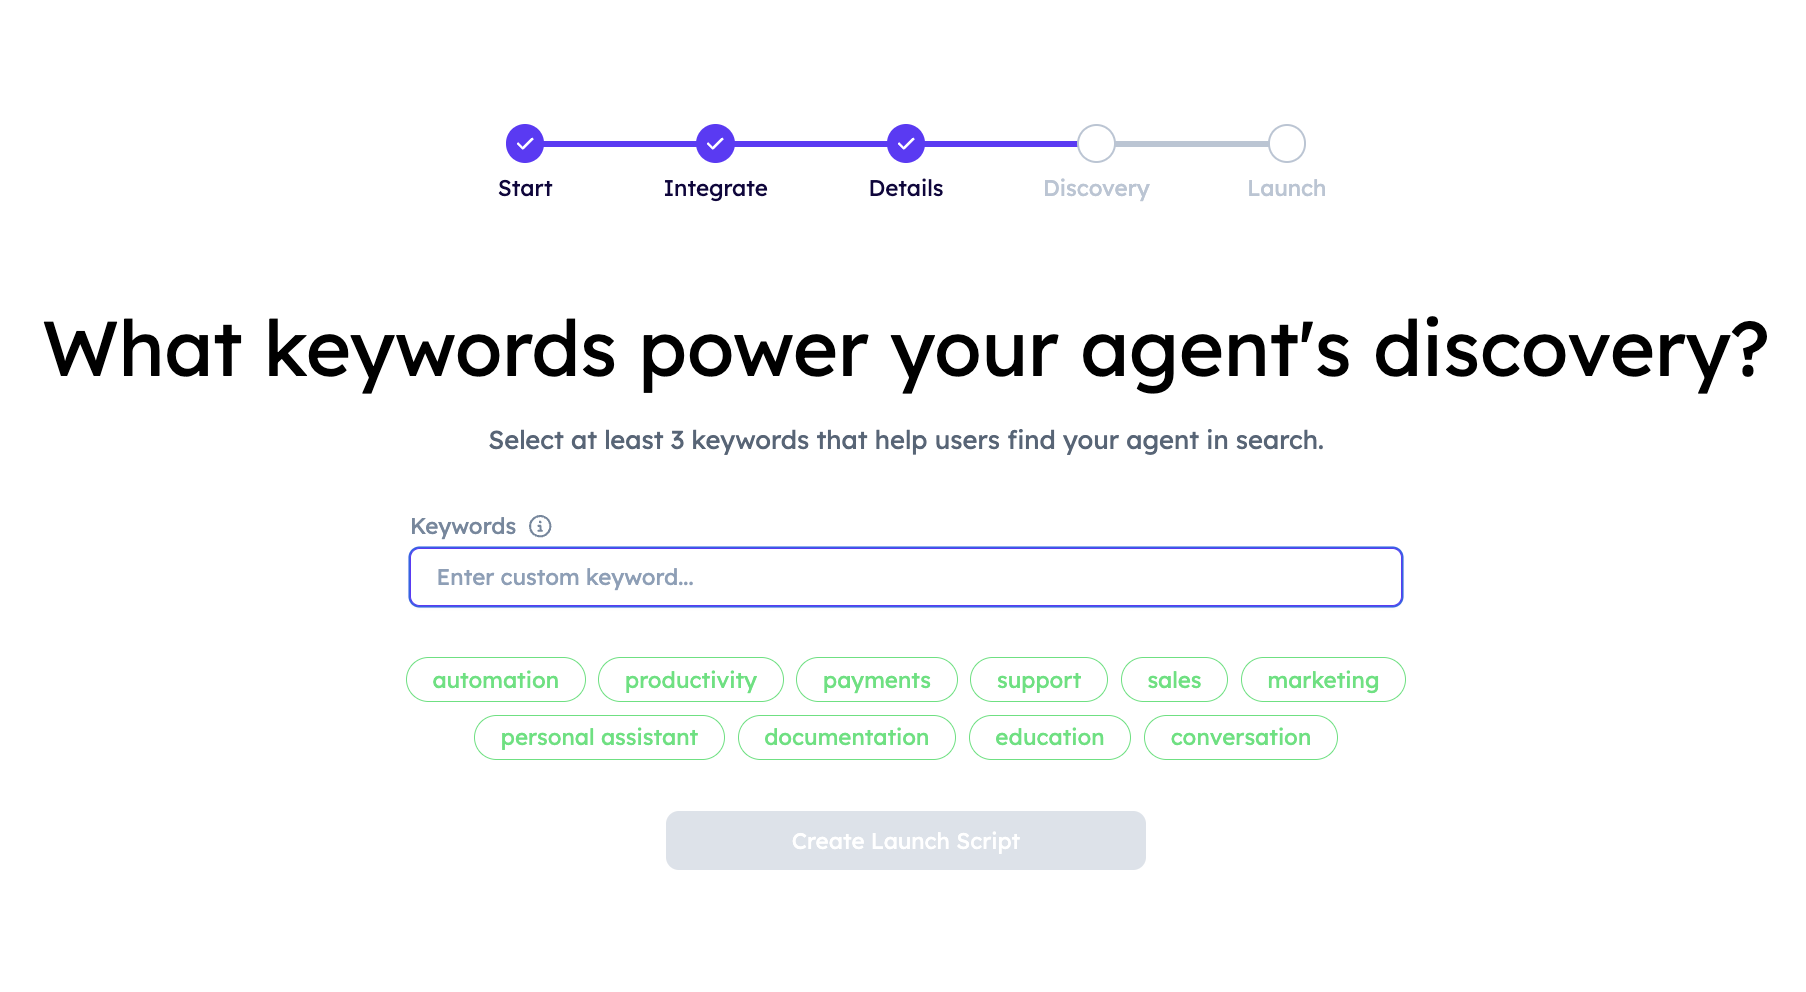
Add keywords that reflect your Agent’s functionality to improve its discoverability across Agentverse and ASI:One.
Agentverse will now display your agent registration details.
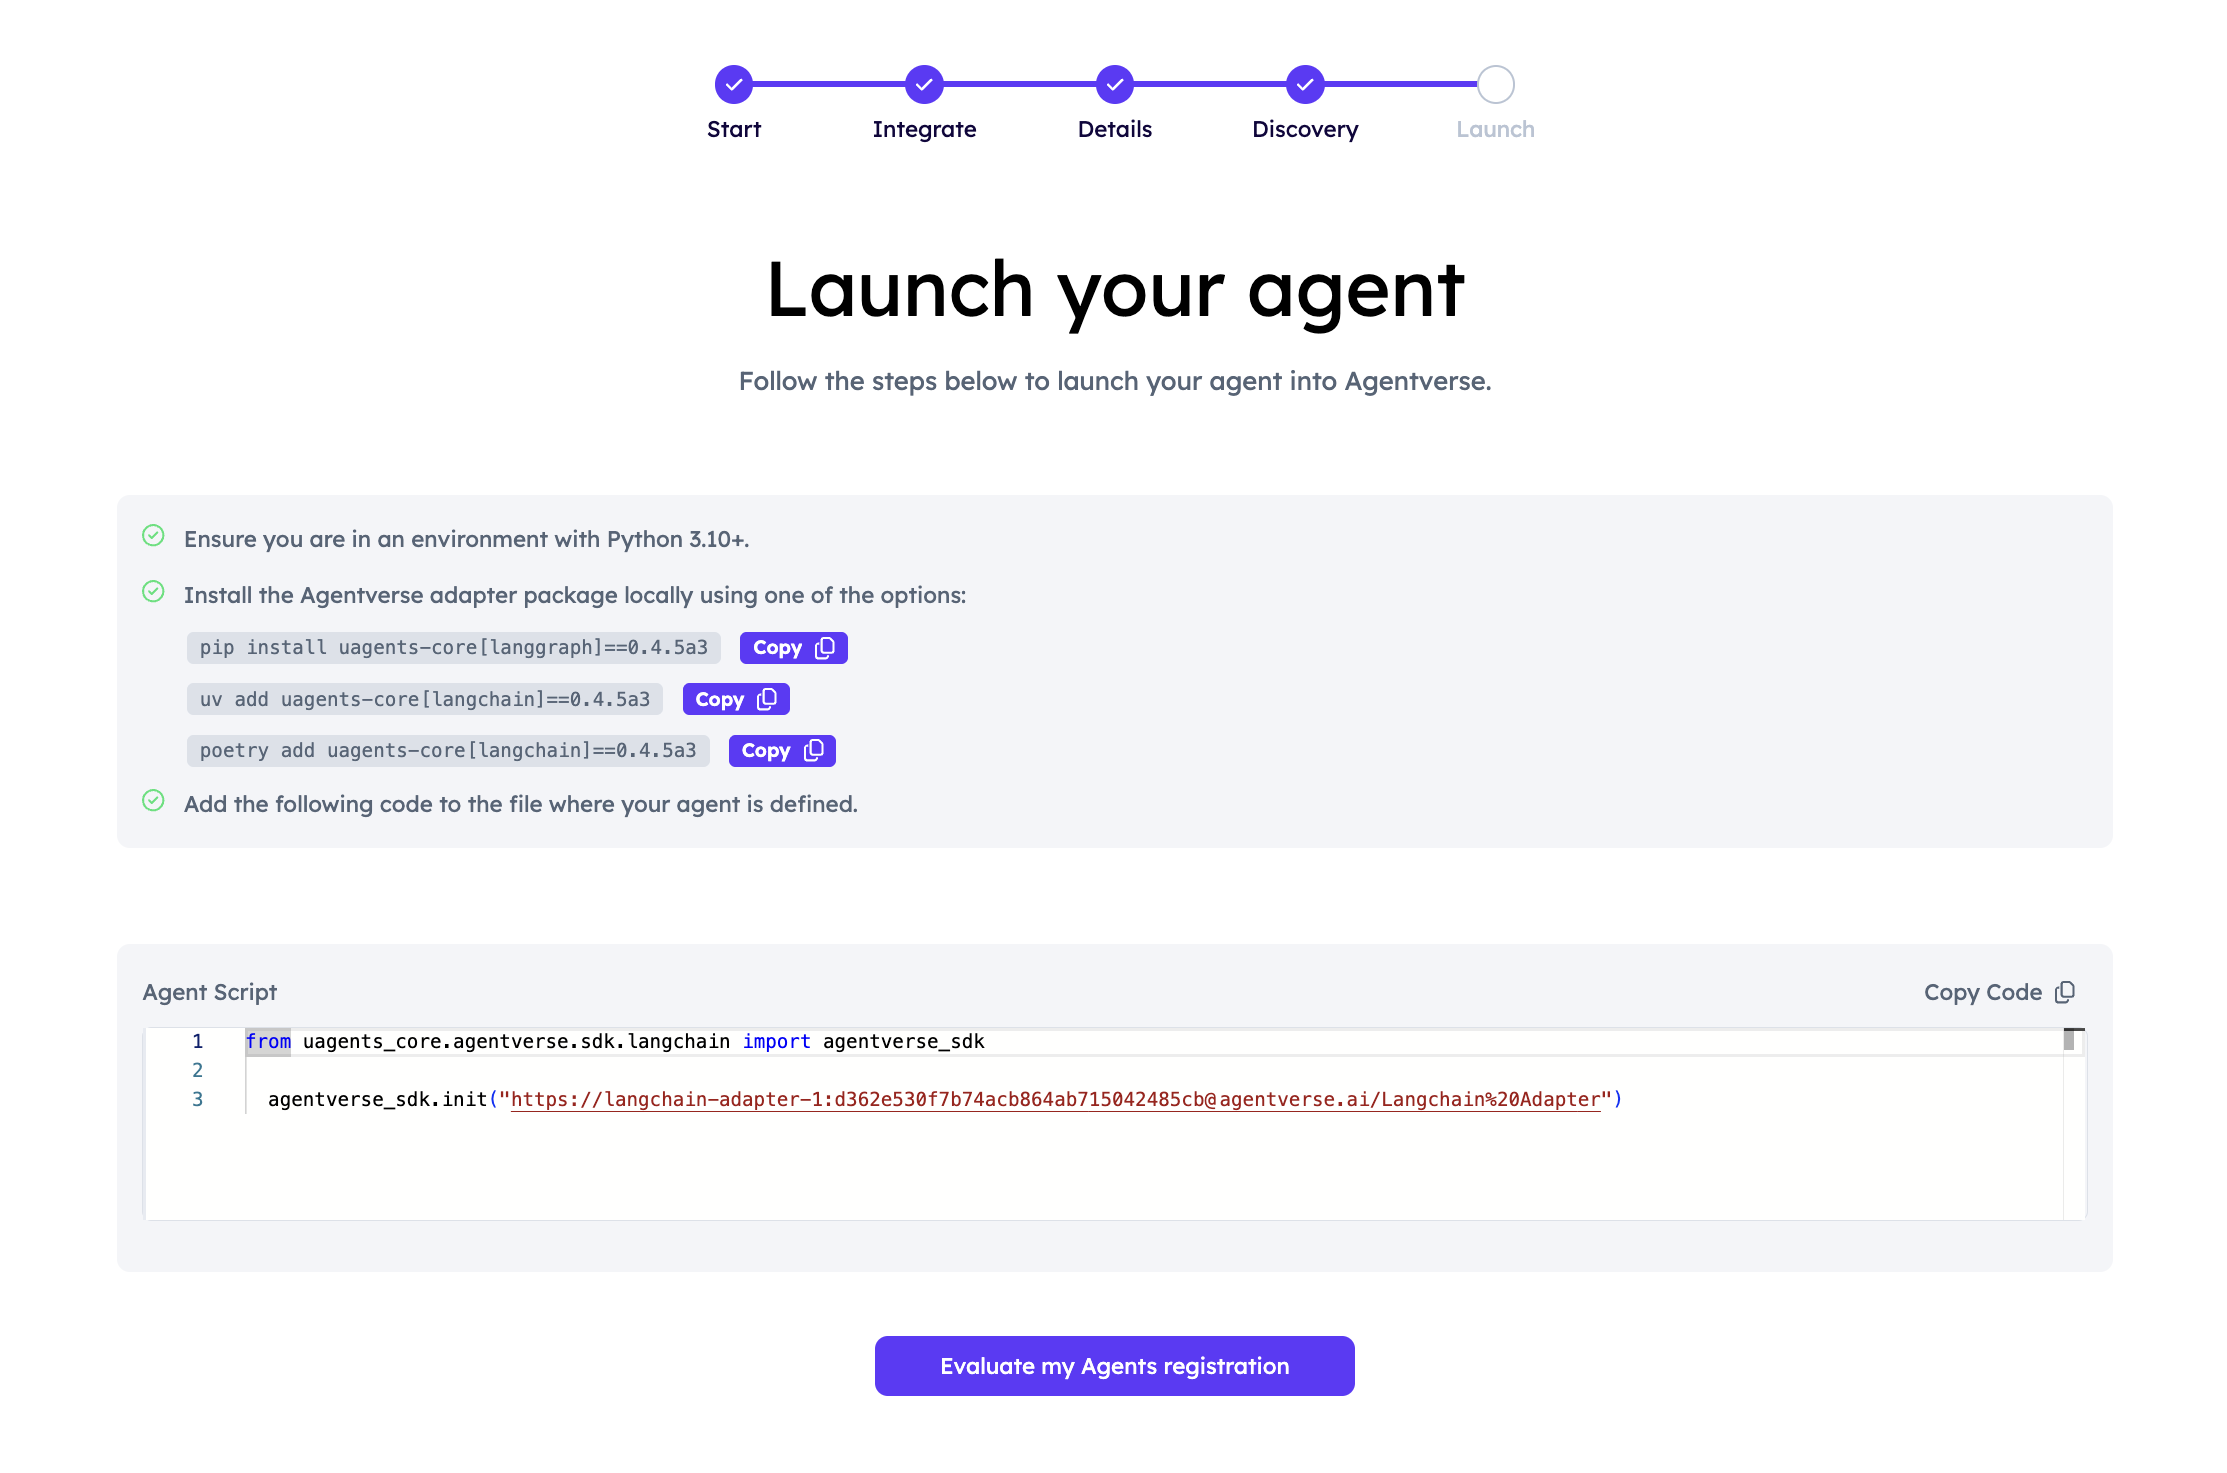
The string passed to agentverse_sdk.init(...) is the Agent URI used to register and expose the agent in Agentverse. Ensure dependencies are installed, then set AGENT_URI and ASI1_API_KEY, and configure langgraph.json. Finally, run langgraph-av dev --tunnel to start the public server. Once the tunnel is active and the agent is reachable, you can evaluate the registration in Agentverse using the dedicated button.
Upon successful registration, you should be able to explore the Agent’s dashboard on Agentverse and chat with the Agent.

Great! You have successfully launched your LangChain Agent on Agentverse!