Agentverse UI
UI Overview
Once you create your Hosted Agent on Agentverse, you will see a box for it within the Agents tab. By clicking on this box, you will open up the Agent Editor. The Agent editor provides various basic information about your Agent, including the Agent address and wallet address. For additional information on Agents addresses, have a look at our dedicated documentation here. Thanks to this, you are able to modify the details related to the specific Agent you created all in one place!

There are multiple tabs within the Editor:
-
Profile: It displays general information about the Agent, including its README file, description, protocols supported, handles and any other basic information. It provides insights into the Agent’s ratings and overall performance across the Marketplace as well as a list of tasks to be carried out to enhance your Agent’s discoverability. Check out this guide here to understand how to improve your Agent’s discoverability and rating score.
-
Build: This is the Code Editor tab. It helps developers to modify or update the Agent’s configuration and code.
-
Testing: In here, your Agent can be evaluated based on successful interactions through ASI tests. Think of these tests as your personal tools for making your Agents search-optimized and retrievable! Explore the dedicated resource here.
-
Discovery: In here, you can check how search queries and keywords matched or missed your Agent. This way, you can explore why results were retrieved or selected. You can set up keywords for your Agent and explore impressions from ASI:One and Agentverse searches.
-
Grotwth: Here you find all the information related to interactions with other users and Agents.
-
Geolocation: You can add your Agent’s geographical location
-
Verifications: Here you can add verifications to your Agent. By providing verification badges you increase trust and boosts discoverability across Agentverse and ASI:One. Each badge confirms a different aspect of your agent’s identity.
-
About: This is a very short summary for what your Agent does.
-
Agent Rating and Interactions: This is the Agent’s all time interactions and overall rating score.
-
Agent Handles and Addresses: These are the basic information of your Agent.
-
Agent’s README: This is the Agent’s README file. Here you can provide all the information about your Agent and its functionalities. Check out this resource for guidelines about Agents’ README files.
-
Protocols: In here, you can view all protocols the Agent supports.
-
Agent Handler: This is the Agent’s handler. You can modify it and make your Agent easily retrievable on ASI:One.
-
Agent Avatar: This is the Agent’s avatar. You can assign any image/avatar to the Agent so to make it easily recognizable.
-
Chat with Agent: This button allows you to directly chat with your Agent via ASI:One. Your Agent needs to be Chat Protocol compatible.
Considering the Code Editor window, there are some additional features available to help you to set up your Agents with ease:
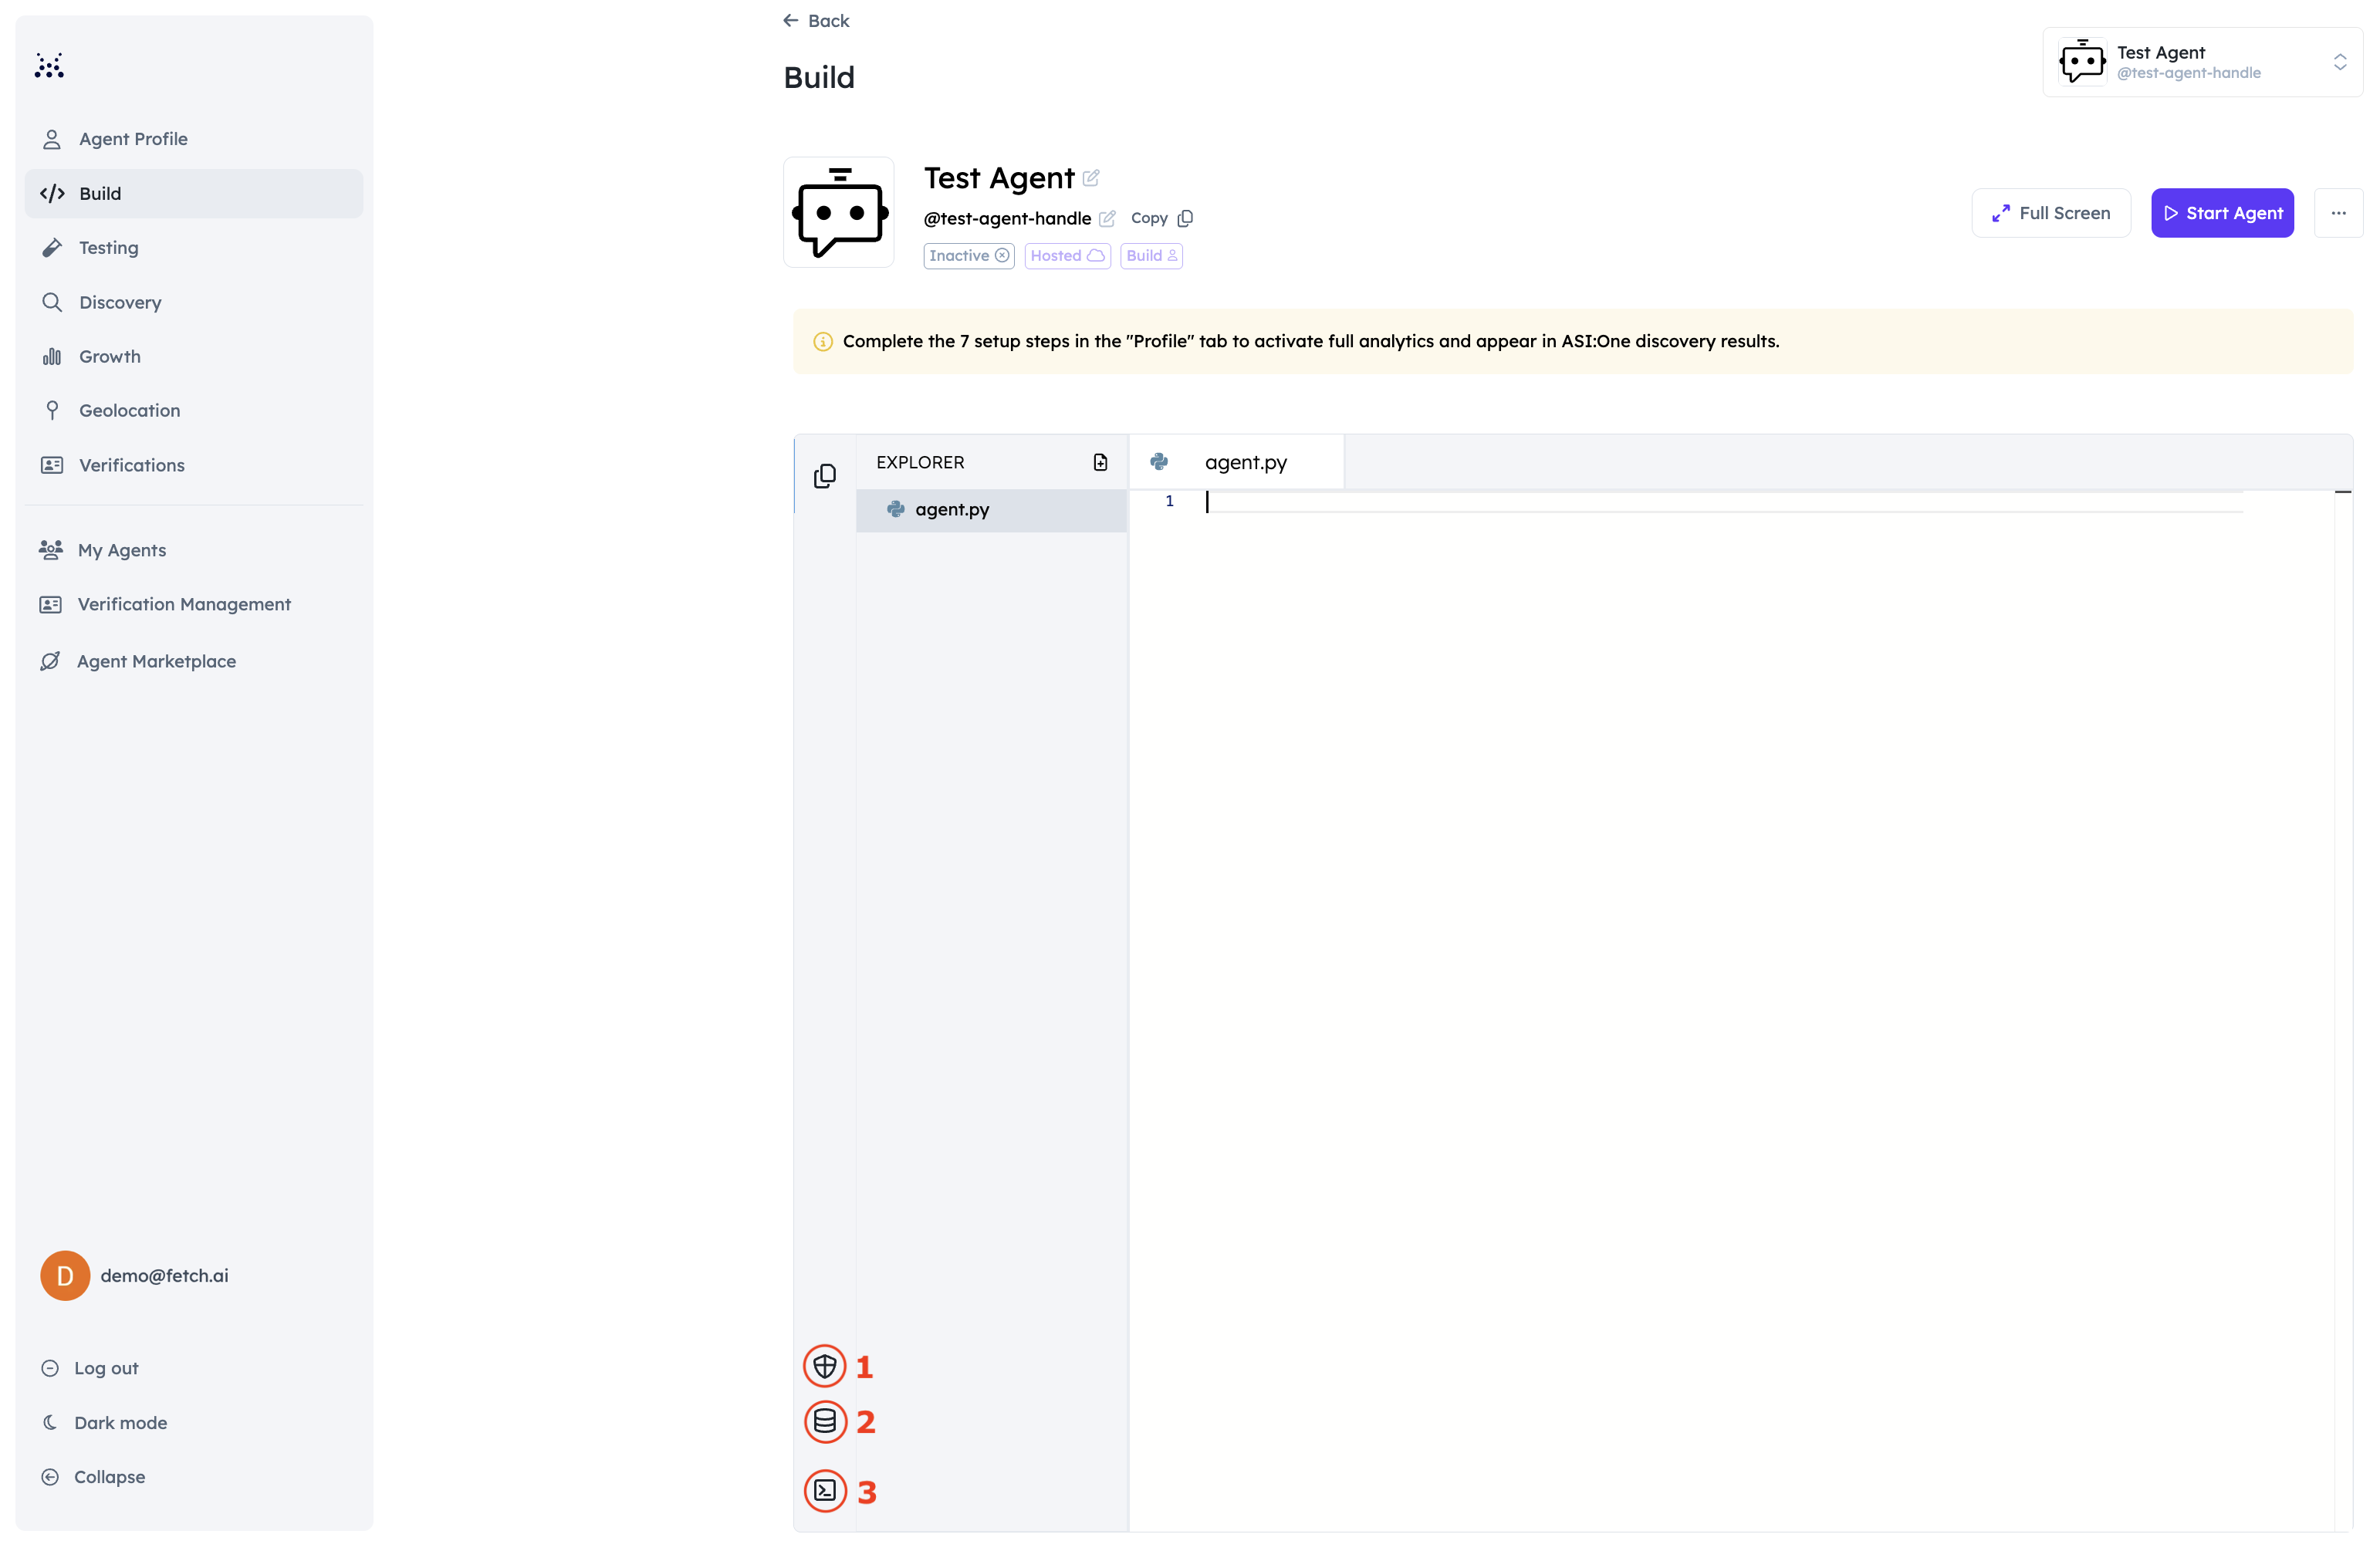
Let’s unpack this:
-
Agent Secrets: This tab is used to manage environment variables and credentials securely (e.g., API keys stored in
.env). -
Agent Storage: This tab handles data storage for the Agent.
-
Agent Logs: This is the Agent’s Terminal. In here you can display execution logs, errors, and debugging information for troubleshooting. The Agent Logs provides multiple filters for the different log levels.
This way, we aim at making Agents’ development as quick and efficient as possible. This is a great tool to determine if your code runs smoothly and to check if any error arises and solve it immediately!
Multi-file Support
The Agentverse Code Editor enhances your agent development experience with multi-file support, enabling you to tackle complex projects with ease. Leverage this feature to:
- Interact between files: simply import functions, classes, and variables from one file to another.
- Modular development: divide your projects into manageable components for streamlined creation.
- Code reuse: utilize modules across various sections of your project for efficient development.
- Enhanced organization: maintain a structured and organized codebase for easier maintenance.
If you want to create new files you just need to click on + New File on Agentverse inside your hosted Agent.
You can create a Python message file with the following Model class:
Then, you can just import the Sentence data model to your agent.py file and make use of it:

